Manage Projects
With Mason’s fully customizable OS, you’re able to specify the behavior, applications, and settings of your devices at a granular level. The secret to truly customizing your Mason operating system are configs, Projects, and Groups.
Configurations are the key to unlocking the exact user experience you want for your app on a Mason device.
Projects are a way to organize a set of configs and deploy them to your fleet of devices over-the-air, from anywhere in the world.
Groups allow you to organize your devices according to your workflows and needs, updating thousands of devices at once with the same settings as specified by a Project.
This how-to article comprises everything you need to know to manage your Mason Projects.
Definitions
What is a project?
One of the most powerful tools Mason offers for managing your device fleets at scale is the Project. A Project is a set of behaviors specific to a Mason device type and Android version that determine how your app will act and function in the hands of your end users. A Project is comprised of a collection of APK files, media files, and Mason OS configurations specified in a .YAML file that you can deploy to a device Group via either the Mason Controller or the Mason CLI.
You may also see Projects referred to across documentation as a “build.”
With over 500 different OS configurations available, you can create a truly custom app experience for your customers. Here are just a few examples of device behaviors you can specify within a Project:
- Lock down a device to only your app
- Disable unnecessary background processes to save battery life
- Disable the camera
- Automatically grant permissions to your app, no popup required
- Whitelist certain Android settings that will be made available to your end user
Projects are a powerful tool to take control of your app experience and create a truly customized user experience. You can use Projects to test the expression of different Mason OS configurations on your devices. You can also use Projects to test different versions of your apps across different Mason OS configurations.
What is a config?
A Mason OS configuration or “config” is a set of behaviors specific to a particular device family and OS version. Each Mason device has its own config glossary; your config file will be defined in the YAML file format and reference attributes within that specific device config glossary. Configs allow you to to fully control and customize your Mason OS and app experience, resulting in a number of benefits including but not limited to improved security and ultra-specific app functionality.
YAML files are easy to validate using linting and parsing techniques. For more information about YAML formatting, visit the YAML page on Wikipedia.
What are Groups?
Groups are a set of devices within your fleet that you will apply a set of app behaviors to via Project deployment in the Mason Controller. A device can only belong to one Group at a time, but can be moved between Groups as needed. A Group can only contain one device family at a time, as different devices will have a different set of applicable configurations.
Groups are a way for you to easily manage and organize your device fleet, giving you full control over:
- Deployments
- App updates
- OS updates
- Device configurations
- Security patches
Build & deploy a Project in Controller
Let’s start by creating a Project within the Mason Controller web app.
-
First, make sure you’re signed up with a Mason account. Head to the signup page, enter your details, and click the link in the verification email you’re sent. If you’re already signed up, skip to the next step.
-
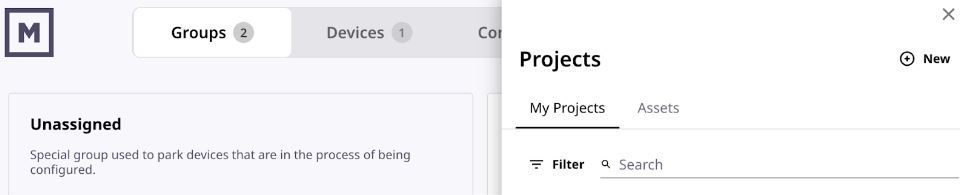
Next, head to the Controller dashboard and choose the “Projects” button in the top-right corner. Hit the “+ New” button.
- You’ll be taken through the Controller Project build wizard. First, select the device you’d like to build with. You can choose from the A4100 smartwatch, the D450 or D215 handhelds, or the G450 tablet form factors.

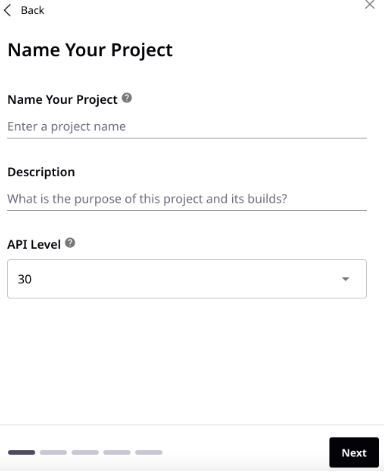
- Name your Project and add a description. We recommend using naming conventions that help you identify one project out of many. Choose your API level — this corresponds to the Android version on your device: level 25 for Android 7, level 27 for Android 8, or level 30 for Android 11. Hit “Next.”
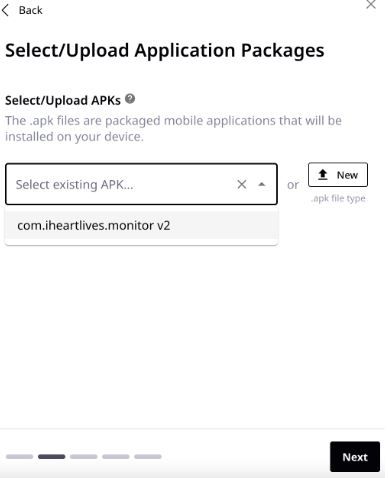
- Select application packages you’ve uploaded previously or upload a new .apk file. This is your Android Package file that has your app on it. You can have multiple APKs in your project. Hit “Next.”
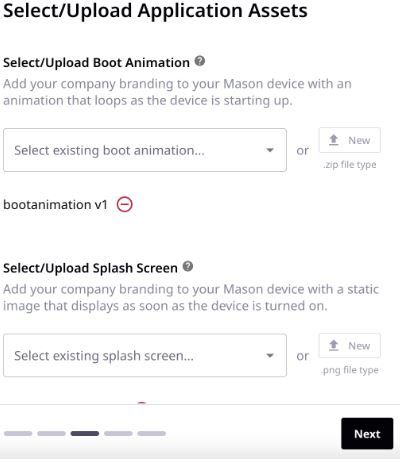
- Select application assets you’ve uploaded previously or upload new assets. You’ll be selecting a boot animation (the animation that loops as the device is starting up) and a splash screen (a branded static image that displays as soon as the device is turned on). Your splash screen image needs to be in PNG format. We recommend a square image with dimensions of 1080x1080 pixels. Hit “Next.”
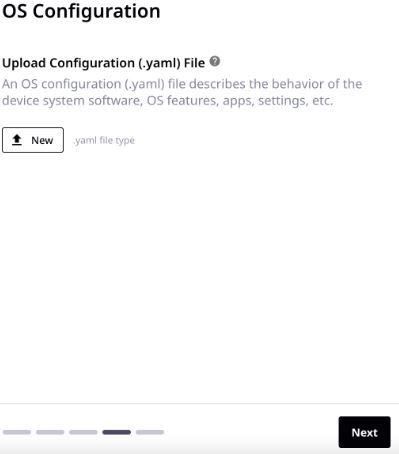
- Upload your OS configuration (.yaml) file. Your .yaml file should reference the Project name and the names of the apps and media files you wish to deploy. This is the file that describes the behavior of the device system software via OS features, apps, settings, and more.
- On the final step of the wizard, review the information and files you’ve provided so far, fixing any validation errors prior to building your Project. Here you also have the ability to update your YAML file in the YAML editor window. You’ll also either create a new deployment Group or choose an existing Group to deploy your Project to. If you want to deploy your new Project settings to devices immediately, choose the Build & Deploy button. If you want to simply build your Project without deploying it to devices yet, choose “Only Build.”

After choosing “Only Build” or “Build & Deploy,��” we’ll attempt to build your Project. If there are any errors, the build will fail and you’ll receive an error message with a note explaining why. If there are no errors, your Project will be successfully built and/or deployed to a Group of devices. Congratulations!
Build & deploy a Project in the Mason CLI
The Mason CLI is an advanced option for more technical users interested in defining your app behavior with greater detail and control. We’ll go over how to create a Project using the CLI now.
-
Begin by installing the Mason CLI.
-
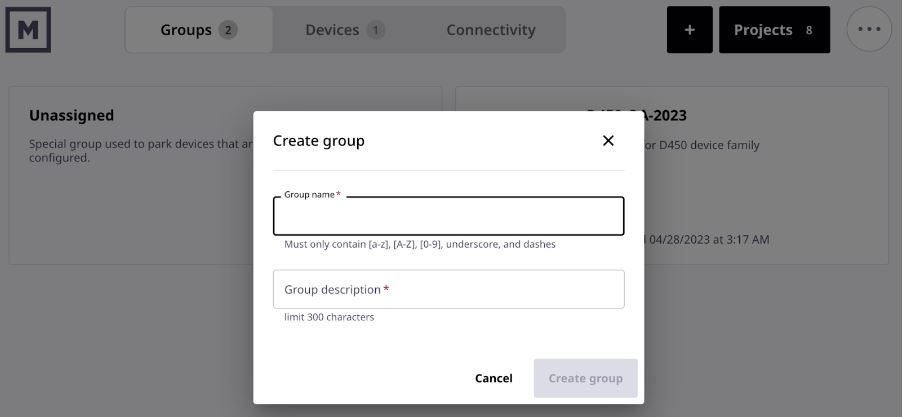
You’ll need to assign your devices to a Group in order to deploy your configurations via Projects. Groups can only be created via Controller or the Mason Platform APIs at this time. To create a group, head to the Mason Controller interface. Click the plus sign in the top right corner and choose “New deployment group” from the dropdown menu. Fill out the name and description, then hit “Create group.”
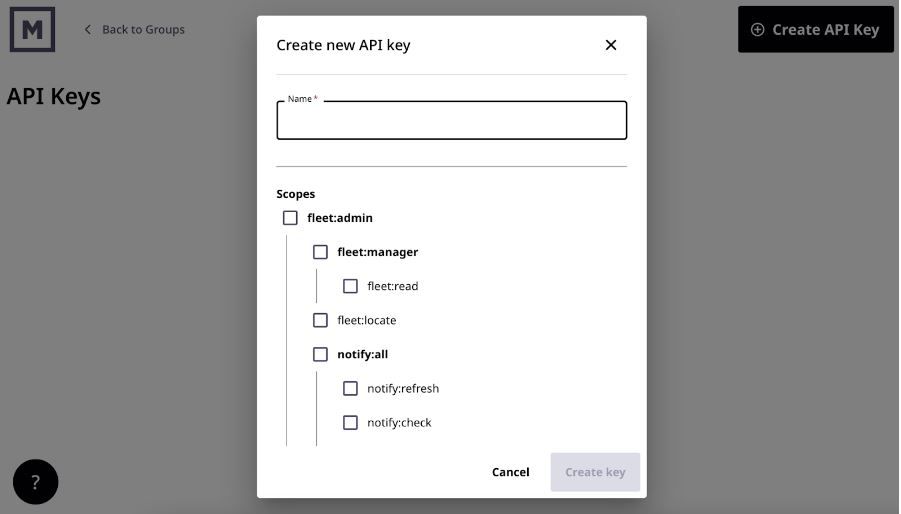
- Next, create your Mason API key. All authentication for the Mason CLI is done via API keys. To create an API key, head to the Controller dashboard and click the three-dot menu in the upper right corner. You should land on the API Keys page. Check the boxes under Scopes that correspond to the level of access you wish to grant, then select “Create key.” Your API key will appear in a popup on-screen; save it somewhere safe, as this is the only time you’ll be able to see this token.
- Use the following command to create your project:
mason create project [flags]
The required flags needed to build a project via the CLI are as follows:
[flags] =
--apiLevel
--description
--deviceFamily
--name
--api-key
Your code output should look something like this example:
mason create project
--name iheart-lives
--description testing devkit project creation
--deviceFamily D450
--apiLevel 30
--api-key [MASON_API_KEY]
Project names are case sensitive.
The next few steps involve registering your artifacts. Artifacts are APKs, media files, and configs. When you register an artifact, it uploads it to the Mason platform. APKs and media files can be referenced by configs once registered. Then, they can be deployed to your devices.
Don’t worry — if you don’t have any artifacts to test out, we’ve got you covered with some samples. These sample files were created for a fictional company called iHeartLives, used to demo the Mason platform.
- Download a sample APK file
- Download a sample boot animation file
- Download a sample splash screen file
- Download a sample config for a handheld device
- Download a sample config for the watch
To register an application, use the following command. Your application must be in the .apk file format.
Your command will look something like the following:
To register a boot animation, use the following command. Your animation must be in a .zip folder (to see an example of valid formatting, you can check out our sample boot animation file. For more details, visit the Android Docs).
Your command will look something like the following:
To register a splash screen, use the following command. Your splash screen must be a .png file
Your command will look something like the following:
To register a config, use the following command:
Yours should look something like this:
This will kick off a build of your Project. The success/failure of your build will be shown in both the CLI and in Controller under the “Project Details” page.
Once your Project has been built successfully, you can deploy it to your device Group. To deploy your Project, use the following command:
Your command should look something like this:
If there is a device in the specified Group, shortly you will see the device start its update. If there are currently no devices in the Group, no download will begin and devices will update as soon as they’re moved into said Group.
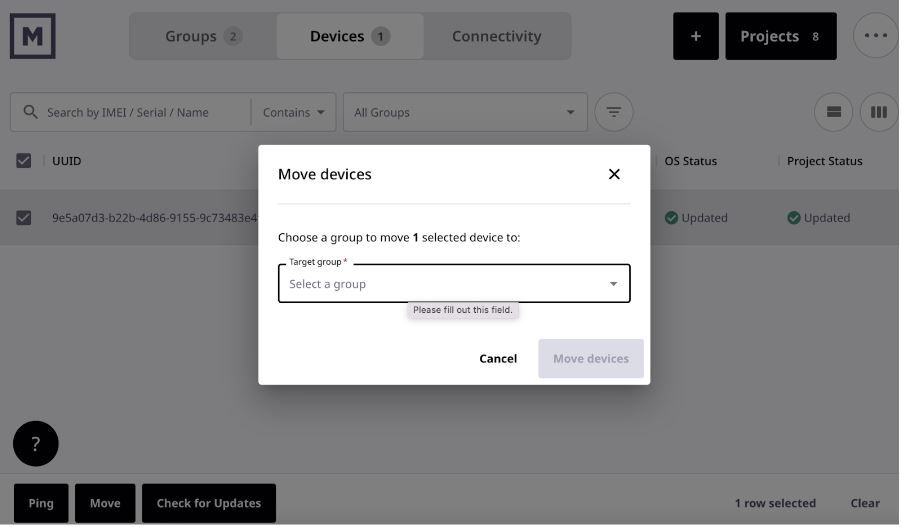
To move devices into a Group, head to Controller and choose the Devices tab. Check the boxes of the devices you wish to move, then click “Move” and choose your target Group. Hit “Move devices.”
Make sure that your device:
- Is connected to Wi-Fi or cellular. Downloads will happen more quickly over Wi-Fi.
- Has at least 20% battery
- Is in the correct group
Once you’ve deployed your Project to your Group, you should see your device boot directly into the application.
Create a custom Mason OS config
Every piece of Mason hardware has a specific set of configurations that apply depending on its device family and the version of Android it’s using. You can access lists of supported config settings for devices and Android versions by visiting our Mason OS page and selecting your device.
In this section, we’ll cover Mason OS configs and some definitions for how they’re built.
EXAMPLE: Mason OS configuration
Let’s start by walking through an example configuration. The following code is an example Mason OS config for a purpose-built device used by a logistics company:
Config definitions
Let’s walk through the definitions for the example config above.
os: The os: tag is the metadata declaration for the Project config. The “name:” and “version:” fields are required. The “configurations:” section is where you’ll enter config data that defines the exact behaviors you want on your custom Mason OS.
os: name: In this field, you’ll enter the name of the Project you’ve already created. In the example above, the Project name is “warehouse-distribution.” Remember that Project names are case sensitive.
os: version: The “version:” should be a number that represents your Mason OS config’s operating system version. This field is generally numeric and always monotonically incremented.
Anywhere that a version is specified, you can choose to use the word “latest” instead of a number. This offers a more hands-off approach to versioning, as Mason will increment the config versions for you.
Mason OS name: and version: combinations must always be unique. Configs that include name/version combos that already exist will be rejected as duplicates.
os: configurations: In this field, you’ll specify the configs that determine how your custom Mason OS will behave on your Mason device. They’re a set of rules and attributes that will result in a specific behavior or state of the OS when deployed to a device. You can dictate anything and everything you might need, from update policy to UI behavior to even hardware behavior for a specific Mason device.
Configs are specific to Mason devices and Android versions.[ See a full list of configs by device in the Mason OS overview section here]/mason-os/overview).
apps: This is where you include all the registered Android applications you want to include in your software build. Only “package_name:” and “version_code:” are required.
apps: name: This defines an arbitrary name for your application; it’s just for your own record keeping and not required.
apps: package_name: This attribute comes from the package name in your .apk file’s AndroidManifest.xml.
apps: version_code: This attribute comes from the version code in your .apk file’s AndroidManifest.xml.
Our Mason CLI documentation provides more details on registering an Android application to the Mason platform.
media: This is where you add the media files that customize your end user’s experience. The supported media types are boot animations and splash screens.
Our Mason CLI documentation in the Setup Guide provides more details on registering a boot animation, config, and splash screen.
Contact our friendly customer success team at support@bymason.com. We’re here for you!