Manage Groups
Groups are a way for you to easily manage and organize your device fleet, giving you full control over:
- Deployments
- App updates
- OS updates
- Device configurations
- Security patches
Within each Group is anywhere from one to thousands of devices. Groups represent a collection of devices that have a deployment state associated with them. When you want to make a deployment to a subset of your device fleet, Groups make it easy to apply the same settings to many devices at scale.
You can organize your Groups however it makes the most sense for your business. A few common examples of helpful organization methods:
- End user (i.e. patients, clinicians)
- Product (i.e. heart rate monitoring, data collection hub)
- Where a product is in the development lifecycle (i.e. staging, QA, production)
Once a Group contains at least one device, you can deploy a Project to that Group and the device will update in real time with your successful deployment. If you would rather preschedule deployment updates, you can do so via the advanced functionality of the Mason CLI.
Key facts about Groups
- A Group can only contain devices of the same device family. For example, you could have one Group with D450s and one with D215s, but not a single Group with both D450s and D215s.
- Each device can only belong to one Group at a time.
- You can move devices between Groups.
- You cannot nest Groups or relate them to one another; each Group’s behavior is distinct and separate from the others.
Creating a Group
Groups can only be created via Controller or the Mason Platform APIs at this time. Here, we’ll cover creating a Group via Controller.
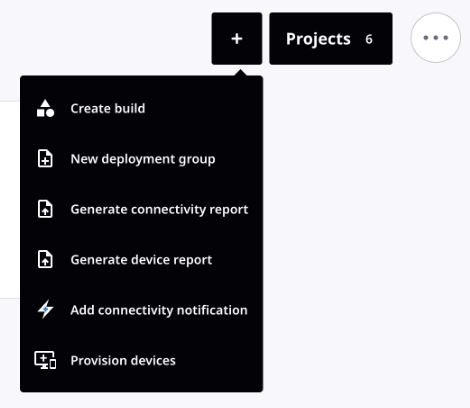
To create a Group, head to the Mason Controller interface. Click the plus sign in the top right corner and choose “New deployment group” from the dropdown menu:
Add your Group name and description. Consider the naming conventions that might be most useful to you down the line, as you can organize Groups in whatever manner best suits your workflow. We find that many Mason customers like to create Groups that correspond to types of end users (i.e. patients or clinicians), product types (i.e. patient diaries or wearable health monitors), or where a product is at in the development lifecycle (i.e. QA, staging, production).
Moving devices between Groups
Whether your device is currently in the default Unassigned Group or needs to be moved from one Group to another, the moving process is the same.
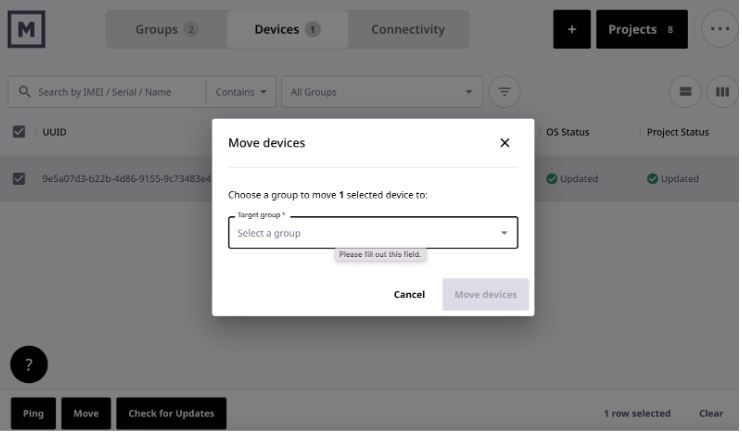
To move devices into a Group, head to Controller and choose the Devices tab. Check the boxes of the devices you wish to move, then click “Move” and choose your target Group. Hit “Move devices.”
Make sure that your device:
- Is connected to Wi-Fi or cellular. Downloads will happen more quickly over Wi-Fi.
- Has at least 20% battery
- Is in the correct Group
If the move is successful and your target Group already has a deployment, the device(s) moving to that Group will download the latest deployment after the move is complete. You should see these changes reflected on the device detail page for each device you moved.
Never experiment with moving between Groups using a production device. Try to use a Dev Kit or a test device instead Once moved, devices will download the new Group’s latest deployment and override the previous Mason OS configuration.
What happens if I move a device from a Group I’ve created to the Unassigned Group?
Moving a device that’s running an existing Mason OS deployment into the Unassigned group will clear or reset the config on the device. This is a way to clear a Project configuration from a device without performing a refurbish command, which would unlink the device from your Mason account entirely.
The steps to move a device into the Unassigned Group are the same as for moving devices between existing Groups you’ve created. If the move is successful, the device(s) moving to the Unassigned Group will clear their custom Mason OS configuration and reboot with a standard Mason OS config as soon as they have a stable Internet connection.
Contact our friendly customer success team at support@bymason.com. We’re here for you!