Setup Guide
Without further ado, let’s dive in and walk through building your first proof-of-concept with Mason, step by step.
Create your Mason account
Start off by creating your Mason account through Controller! Controller is the web application used for onboarding, managing, and monitoring your fleet of devices.
- Visit our signup page. You’ll provide your name, company name, email, and a password.
- Next, head to your email inbox to find our verification email. To finish creating your account, click the link in that email.
- Once you’re all verified, you’ll be able to sign in and start exploring Mason’s platform. Woohoo!
Order and provision a device
Let’s walk through the process of ordering your Mason Dev Kit and provisioning your device.
Why should I order a device?
Walking through Mason’s Controller platform (and/or building via the CLI) is one part of understanding the power that our end-to-end mobile infrastructure offers you.
To see your app in action on an actual piece of hardware, you’ll want to order a Developer Kit. This will allow you to see your app functioning on a Mason device and build your proof-of-concept, giving you a tangible tool to review, explore, and share findings with colleagues as you consider scaling your fleet from one prototype to thousands of devices.
If you’d rather follow this guide without a device, or are waiting for your Dev Kit to arrive, that’s no problem — you can still explore the Mason Controller fleet management hub and uncover the power of custom building with the Mason CLI.
What does it mean to provision a device?
“Provisioning” a device is the act of registering a device with your Mason account. With Mason, you can provision your devices multiple ways depending on your needs and the level of manual interaction you prefer:
- Manual provisioning involves physically logging into a device with Mason credentials. This is the highest manual-touch option.
- QR code provisioning involves using each device to scan a QR code created within the Mason Controller. While still requiring manual input, your devices will allocate to the group you selected during the QR code creation and will automatically connect to Wi-Fi if you specified your login credentials as well.
- Auto-provisioning can be set up by the Mason operations team. As soon as your devices are removed from the box, powered on, and connected via Wi-Fi or cellular data, your devices are registered to your Mason account. This option requires a much lighter manual touch.
- Zero-touch provisioning is a form of auto-provisioning where an operations team provisions devices before they ship. It means that as soon as the device is powered on, your device will be registered with your Mason account and all your software and settings will automatically download, cutting out the risk of manual errors. This is the most seamless provisioning option with the least amount of manual input involved.
Order your Developer Kit
First things first: let’s get you some hardware! When you contact our team to order your Dev Kit, we can discuss which form factor best suits your needs, from smartwatches to handhelds to tablets. You should receive your new Dev Kit by your specified "Need By" date, with considerations for carrier issues or special requests that may affect delivery times.
Power on and connect
Once you receive your device, you'll need to take some steps to register it within your Controller account.
The first thing you’ll need to do before registering your device is make sure you have a stable Wi-Fi or cellular connection. It should arrive with an activated, configured SIM card already inserted. If you don’t have a SIM card inserted, you’ll also need to make sure that the time and date are set correctly before connecting to Wi-Fi.
To manually set the time and date, you’ll need to toggle off the “Automatic date & time” or the “Automatic time zone” options and manually set the appropriate settings. Once done, make sure to toggle the “Automatic date & time” or the “Automatic time zone” options back on.
Log in with your Mason account credentials
For the purposes of this walkthrough, we’re going to provision our Dev Kit device manually. Keep in mind that this is the highest-touch provisioning option — QR code provisioning, auto-provisioning, and zero-touch provisioning provide an even more streamlined and swift setup process.
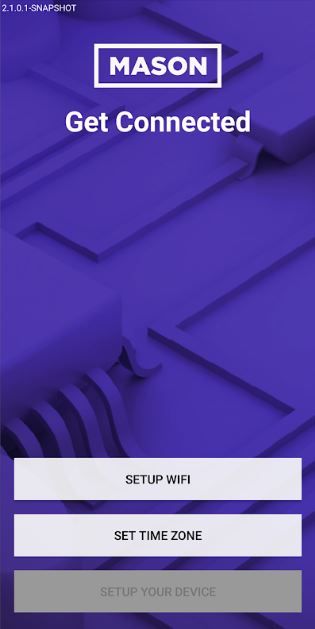
Once you’re connected, you can move forward by choosing SETUP YOUR DEVICE and logging in with your Mason account credentials — this is the same email and password you use to log into Controller.
Once you sign in successfully, the device should appear in your Controller account under the "Devices" tab and will be automatically assigned to the “Unassigned” Group. Now you’re ready to assign it to a new Group, and it’s ready for you to deploy your custom software!
Build & deploy your project
Building your first project with Mason is exciting — you’re about to harness more power and control over your device fleet than ever before!
There are two options for building your project, depending on how technical you are:
- Build with the Mason CLI (good choice for developers)
- Build with Mason’s Controller interface (good choice for less technical users)
Building with the CLI offers more granular customization and control over what you do with your fleet, while building with Controller allows less technical users to create, customize, and deploy new builds to groups of devices. Whichever route you choose, the following resources will guide you and help answer questions you might have along the way.
Build and deploy your project using Controller
Using our web-based Controller interface is a quick and straightforward way to build and deploy your project to your device fleet. We recommend it for users who are less technical or less comfortable building with the CLI.
Follow the steps below to build and deploy your very first project. You’ve got this!
1. Get familiar with Mason definitions
Now that you have a Controller account, you can begin building your first project! Before we start, here are some definitions and concepts to get familiar with:
Groups: A group is a way for you to organize your devices. Devices will default to the “Unassigned” group. Any given device may only belong to one group at a time, and apart from the default “unassigned” group, each group may only comprise one device type.
Configs: A configuration, or “config,” is a static representation of Mason OS. Configs define the behavior of your device, including applications and media. They are versioned YAML documents that reference valid attributes and values defined in the config documentation for your device.
Projects: A project is a collection of versioned Mason OS configs. As you push new versions of your project's Mason OS config, the project will “build” and verify that the Mason OS config you've specified is valid. Successful builds can be deployed to device groups that have families that match the device family of your project. If you try to deploy a failed build, the deployment will fail.
2. Start a new build
Kick off your first project by clicking the Projects button in the top right corner and hitting “+ New.” You’ll start by choosing the device model you’re building your Project around: our smartwatch, handhelds, or tablet.
Work through the wizard, inputting your Project name and description — we recommend using naming conventions that help you identify one project out of many. Consider things like device type, project purpose, where your project is being deployed geographically, anything that could be useful to you later on.
Choose an API level — this corresponds to the Android version on your device: level 25 for Android 7, level 27 for Android 8, or level 30 for Android 11.
Next, you’ll want to upload different artifacts (which consist of APKs, media files, and configs). If you need sample files to work through this walkthrough quickly, feel free to download our example artifacts below:
- Download a sample APK file
- Download a sample boot animation file
- Download a sample splash screen file
- Download a sample config for a handheld device
- Download a sample config for the watch
Your final step in the build wizard is to review what you’ve done thus far and choose or create a group to deploy this brand-new project to. You can either create a new group right here in the wizard, or you can create one on the Controller dashboard by clicking the + sign in the top right corner and choosing “New deployment group.”
If everything looks right, you can now choose to “Only Build” or “Build & Deploy” your new project. Choose “Only Build” if you’re not ready to apply updates to your devices in real time. If you want to apply your project configs immediately, choose “Build & Deploy.” Any devices within the deployment group that are powered on and charged beyond 20% should begin to download the project update you just pushed.
To see the details of your project, head to Controller, click Projects in the top right corner, and choose the project you’re curious about. You can see what a Project Details page looks like, which includes all the information that you input when you're creating your first project:
- Identifier
- Description
- Device type
- API level
- Current and Previous Builds (a Build refers to a customized Android OS that you create)
- The artifacts you’ve uploaded
That’s all you need to do to build and deploy a project to your devices using the Mason Controller. But what if you have the technical expertise and interest in getting more granular with your control? Enter the Mason CLI.
Build and deploy your project using the Mason CLI
Building with Mason’s command line interface (CLI) is a great option for Mason power users, technical users who want more granular customization, and for automation.
1. Install the Mason CLI
In order to build using the command line, you’ll first need to install the Mason CLI. We recommend this for developers and people who are comfortable using the command line.
2. Get familiar with Mason definitions
Now that you have a Controller account and the CLI installed, you can begin building your first project! Before we start, here are some definitions and concepts to get familiar with:
Groups: A group is a way for you to organize your devices. Devices will default to the “Unassigned” group. Any given device may only belong to one group at a time, and apart from the default “Unassigned” group, each group may only comprise one device type.
Configs: A config is a static representation of Mason OS. Configs define the behavior of your device, including applications and media. They are versioned YAML documents that reference valid attributes and values defined in the config documentation for your device.
Projects: A project is a collection of versioned Mason OS configurations. As you push new versions of your project's Mason OS configuration, the project will “build” and verify that the Mason OS configuration you've specified is valid. Successful builds can be deployed to device groups that have families that match the device family of your project. If you try to deploy a failed build, the deployment will fail.
3. Build a new deployment Group in Controller
As you create your build via the Mason CLI, you’ll need to assign your devices to a group in order to deploy your configurations via projects. Groups can only be created via Controller or the Mason Platform APIs at this time.
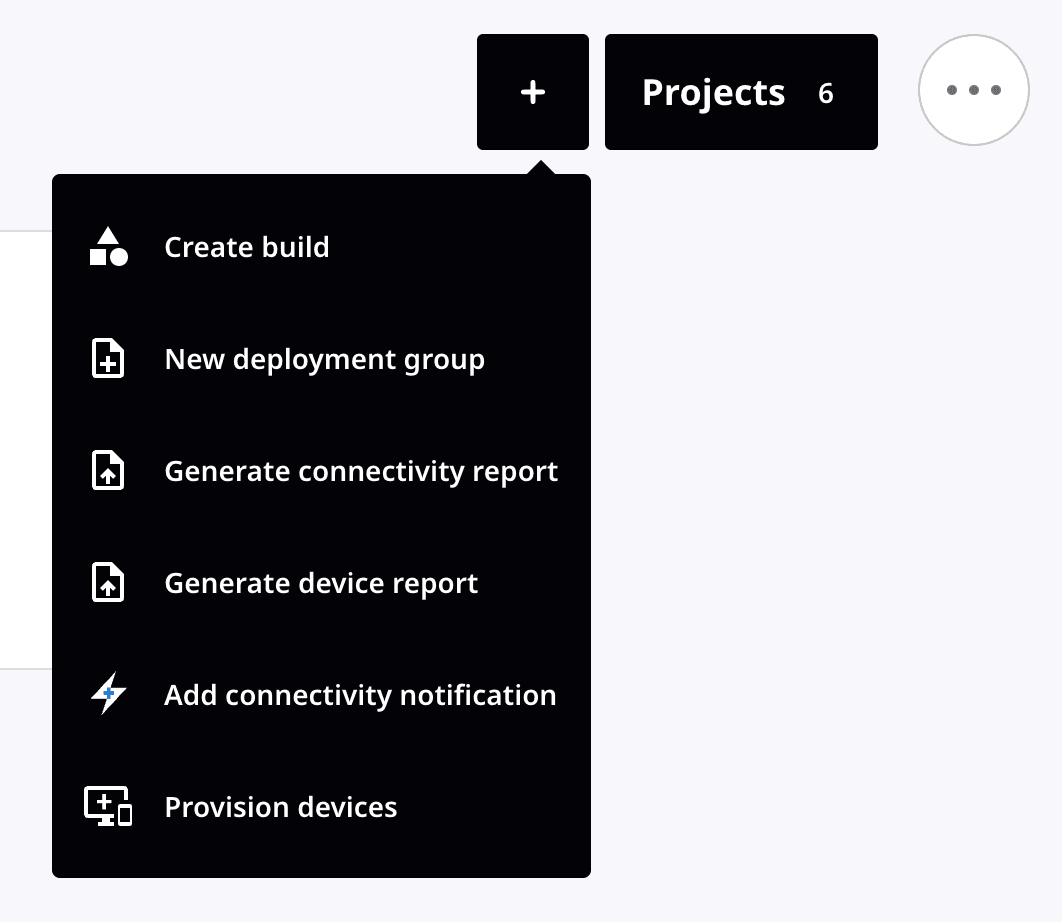
To create a group, head to the Mason Controller interface. Click the plus sign in the top right corner and choose “New deployment group” from the dropdown menu:
Add your group name and description. Consider the naming conventions that might be most useful to you down the line. You can organize groups in whatever manner best suits your workflow. We find that many Mason customers like to create groups that correspond to types of end users (i.e. patients or clinicians), product types (i.e. patient diaries or wearable health monitors), or where a product is at in the development lifecycle (i.e. QA, staging, production).
4. Create an API key in Controller
In the newest version of the Mason CLI, authentication for the platform is done via API keys. To create an API key, head to the Controller dashboard and click the three-dot menu in the upper right corner. You should land on the API Keys page.
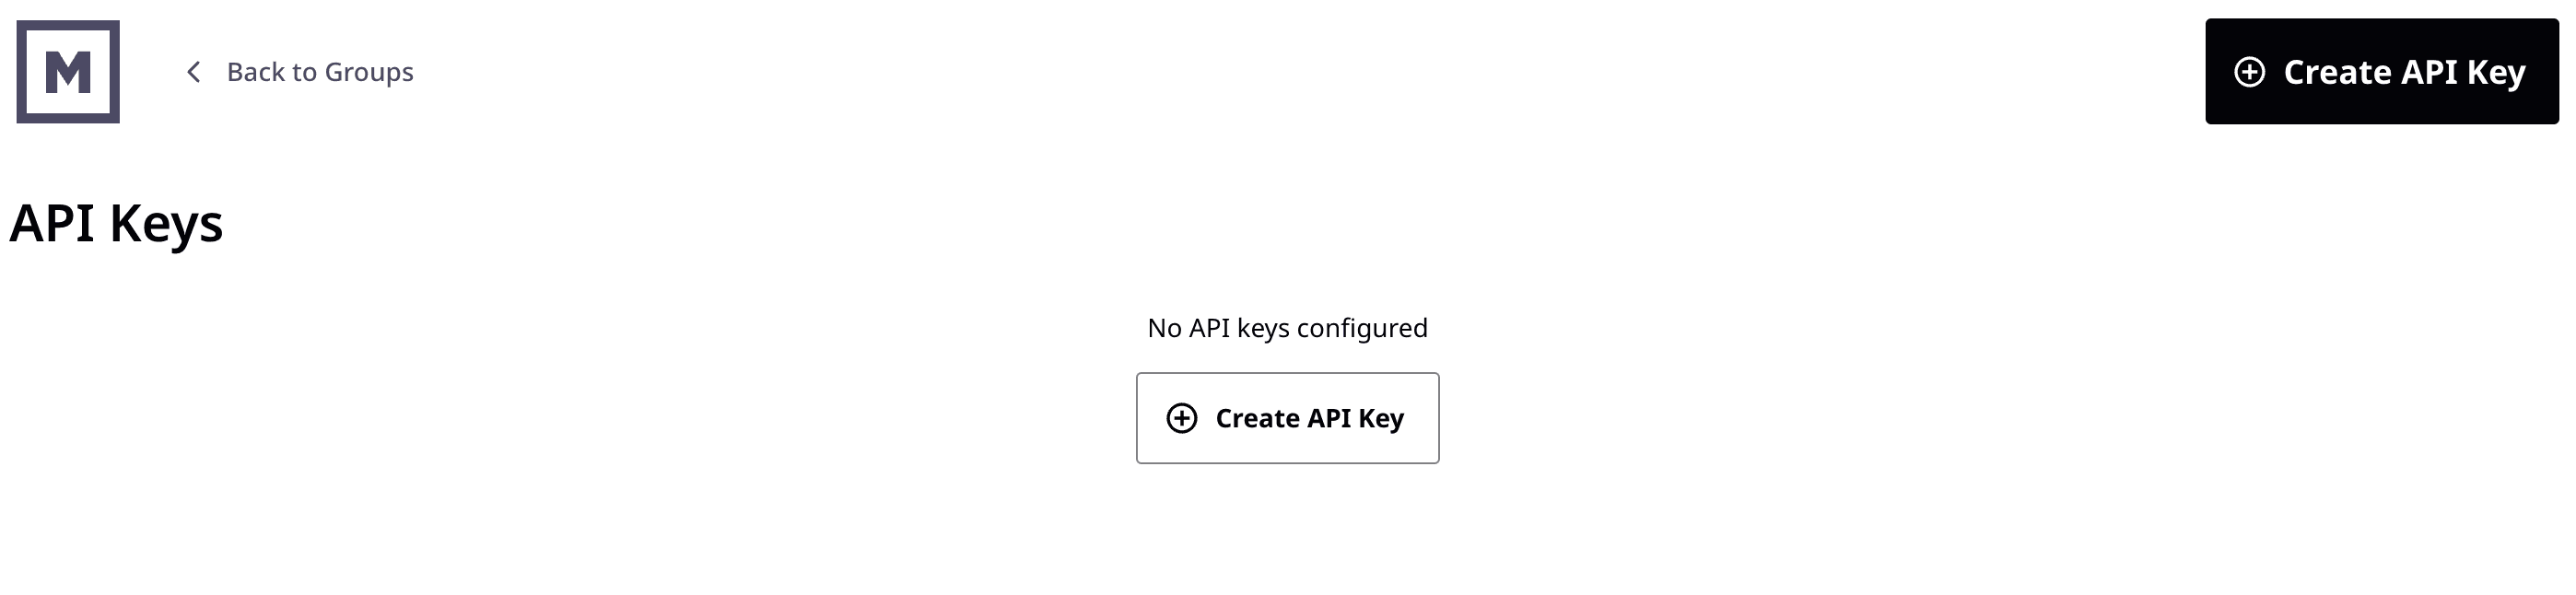
Check the boxes under Scopes that correspond to the level of access you wish to grant, then select “Create key.” Your API key will appear in a popup on-screen; save it somewhere safe, as this is the only time you’ll be able to see this token.
5. Create your Project in the CLI
In this step, you’ll create your project in the CLI. Use the following command to create your project:
mason create project [flags]
The required flags needed to build a project via the CLI are as follows:
[flags] =
--apiLevel
--description
--deviceFamily
--name
--api-key
Your code output should look something like this example:
mason create project
--name devkit-test-handheld
--description testing devkit project creation
--deviceFamily D450
--apiLevel 30
--api-key [MASON_API_KEY]
6. Register your artifacts
Next, register your artifacts. Artifacts are APKs, media files, and configs. When you register an artifact, it uploads it to the Mason platform. APKs and media files can be referenced by configs once registered. Then, they can be deployed to your devices.
Don’t worry — if you don’t have any artifacts to test out, we’ve got you covered with some samples. These sample files were created for a fictional company called iHeartLives, used to demo the Mason platform.
- Download a sample APK file
- Download a sample boot animation file
- Download a sample splash screen file
- Download a sample config for a handheld device
- Download a sample config for the watch
Register an application
To register an application, use the following command. Your application must be in the .apk file format.
mason register apk <path to your APK>
Your command will look something like the following:
mason register apk
--file devkit-D450-apk.apk
--api-key [MASON_API_KEY]
Register a boot animation
To see an example of valid formatting, you can check out our sample boot animation file. For more details, visit the Android Docs.
To register a boot animation, use the following command. Your animation must be in a .zip folder:
mason register bootanimation <path to your boot animation>
Your command will look something like the following:
mason register bootanimation
--file devkit-D450-boot.zip
--api-key [MASON_API_KEY]
Register a splash screen
To register a splash screen, use the following command. Your splash screen must be a .png file:
mason register splash <path to your splash screen>
Your command will look something like the following:
mason register splash
--file devkit-D450-splash.png
--[MASON_API_KEY]
7. Create and register your config
Next, you’ll need to create your config using the text editor of your choice. To get started and to get familiar with valid formatting, download our sample config. Our sample config is set to lock your device into kiosk mode.
Be sure to fill it in with your appropriate APK, media, and project names. If you want to explore more config settings, check out the config glossary (select your device type, then navigate to config glossary).
Check out more config settings in our config glossary. You’ll select your device type, then click the “Configuration Glossary” button specific to that device.
If you registered our iHeartLives sample APK, boot animation, and splash screen, you can download the iHeartLives sample config to get started more quickly. You will still need to fill in the project name.
- Download sample config - iHeartLives
Once your config is ready to go, register it using the following command:
mason register config <path to your config>
Yours should look something like this:
mason register config
--file devkit-test.yml
--api-key [MASON_API_KEY]
This will kick off a build of your project. The success/failure of your build will be shown in the CLI.
Your build’s success/failure status will also be reflected in Controller under the Project Details page.
A failed build status indicates an issue with the files you’ve uploaded. If the YAML structure is off, you should get an error message detailing what occurred and on what line.
If there's a failure during build in the cloud, you may not receive an error message. Carefully double-check your YAML file for errors. If you used your own YAML build, reference our template here to make sure it’s formatted correctly.
8. Deploy your project
Almost done! Once your project has been built successfully, you can deploy it to your device group.
Deploying a project to your device group is how you remotely add new updates and configurations to your Mason hardware. Once a project is deployed, devices will update according to the schedule you’ve determined and reflect the changes of your project in question. Yep — it’s as easy as that!
To deploy your project, use the following command:
mason deploy --push config <project name> <group name> <version> <API key>
Your command should look something like this:
mason deploy --push config
--name devkit-test-12
--group Devkit-test-12
--version 1
--api-key [MASON_API_KEY]
If there is a device in the specified group, shortly you will see the device start its update. If there are currently no devices in the group, no download will begin and devices will update as soon as they’re moved into said group.
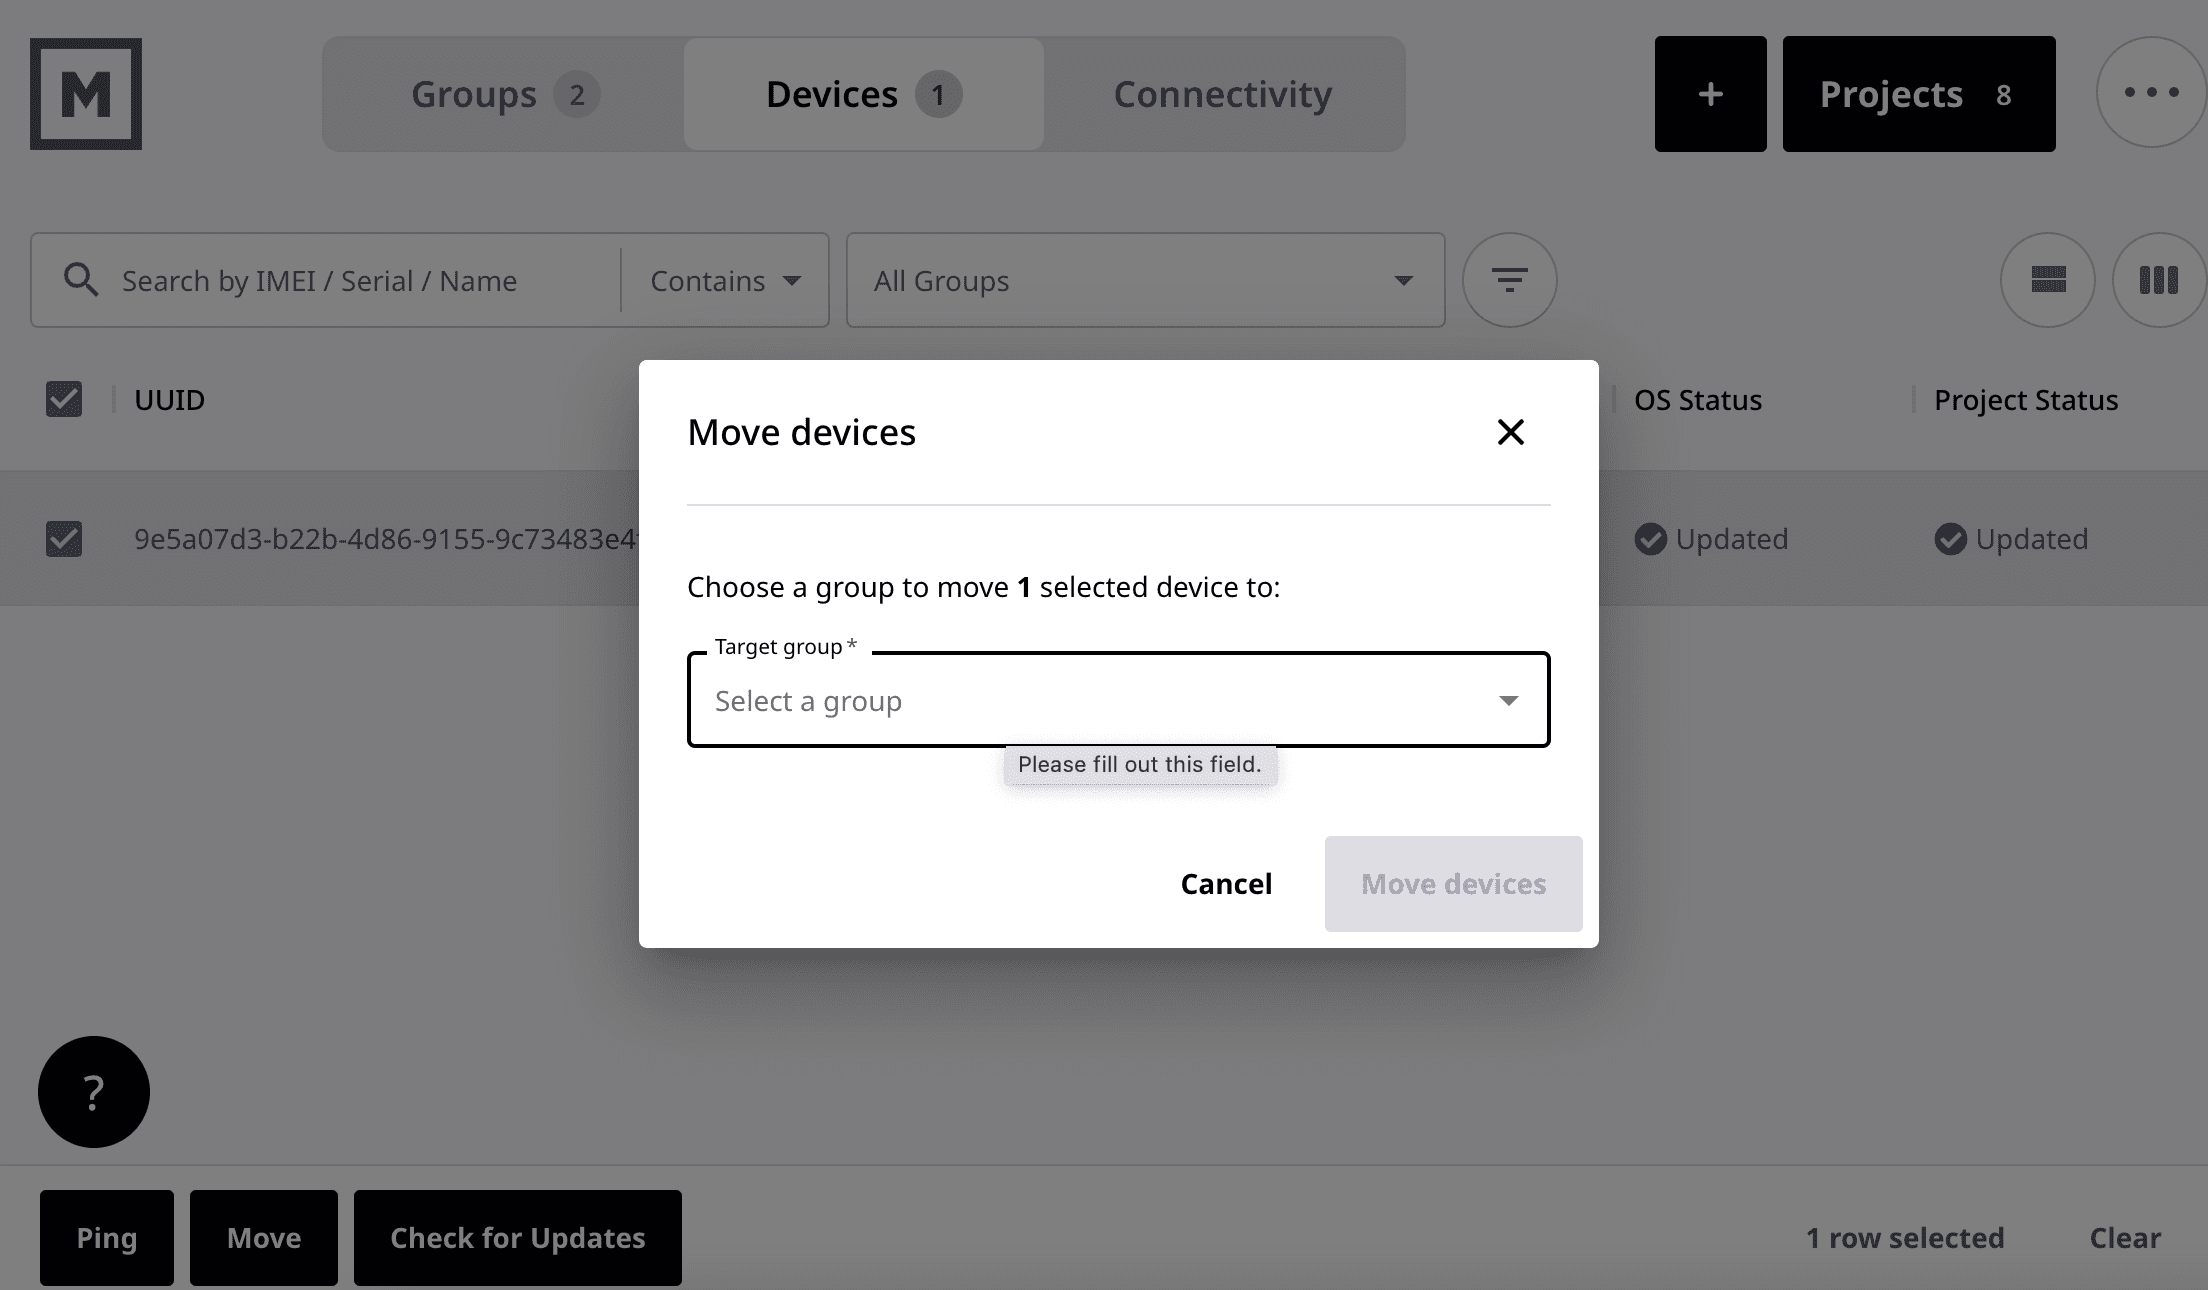
To move devices into a Group, head to Controller and choose the Devices tab. Check the boxes of the devices you wish to move, then click "Move" and choose your target Group. Hit "Move devices."
Make sure that your device:
- Is connected to Wi-Fi or cellular. Downloads will happen more quickly over Wi-Fi.
- Has at least 20% battery
- Is in the correct group
Once you’ve deployed your new project to your group, you should see your device boot directly into the application.
Congratulations — you’ve done it! You just successfully provisioned your device, built a project, and deployed it live to your device in hand. If you used a custom build, now’s the time to explore your app functionality when powered by Mason OS.
Building your proof of concept is just scratching the surface of what's possible with Mason. Once you're done with your first build, you can continue iterating on that proof of concept, or you can dive deeper into how Mason can transform everything: from your app development, to your support processes, to your logistics.
If you have any questions or wish to learn more about moving beyond your proof of concept, our solutions team would love to hear from you at solutions@bymason.com.